Loading... > Nuxt3官方文档:[https://nuxt.com/](https://nuxt.com/) > Nuxt3中文文档:[https://nuxt.com.cn/](https://nuxt.com.cn/) > 模板目录结构文档:[https://nuxt.com/docs/guide/directory-structure/nuxt](https://nuxt.com/docs/guide/directory-structure/nuxt) > 作者:时光 > 个人博客:[https://timebk.cn/](https://timebk.cn/) > 版权声明:原创文章,请勿抄袭,思维有限,敬请指正,转载需注明作者和原文 # 安装 ``` npx nuxi init <project-name> ``` * 安装的时候很大几率会遇到 `Failed to download template from registry: fetch failed` 这个问题,中文直译过来就是 `无法从注册表下载模板:获取失败` ,放心,这不是你和你的网络问题! ## 网上的解决方法 ``` 1. 挂机场 // 实际无效 2. 修改本地网络DNS为114.114.114.114 // 实际无效 3. 在系统hosts文件里添加 raw.githubusercontent.com [该域名ip] // 实际无效 ``` 【重要】没错,上面的三种方法都基本无效! ## 最优的方法 访问以下链接: * [https://codeload.github.com/nuxt/starter/tar.gz/refs/heads/v3](https://codeload.github.com/nuxt/starter/tar.gz/refs/heads/v3) * 即可直接下载模板,是最新的模板,而且不用挂梯子 * 下载好模板后,进行 `npm i` 安装依赖,`npm run dev` 进行项目开发,默认端口3000 初始模板里的 `package.json` ``` { "private": true, "scripts": { "build": "nuxt build", // 打包 "dev": "nuxt dev", // 开发 "generate": "nuxt generate", // 静态生成 "preview": "nuxt preview", // 预览 "postinstall": "nuxt prepare" // 脚本处理 }, "devDependencies": { "nuxt": "^3.3.1" } } ``` # 路由 > pages目录 Nuxt 是属于约定式的,在路由这方面很有新意 * 首先第一件事情就是删除 `app.vue` 里的 `<NuxtWelcome />`,这个是Nuxt官方的欢迎组件 * 然后在 `app.vue` 里添加 `<NuxtPage :page-key="$route.fullPath" />` * 现在,我们只需要在根目录创建一个 `pages` 文件夹 * 接着在 `pages` 文件夹里新增一个 `.vue` 文件(名称的话你自己取,我这里为了方便教程就命名为 `about.vue` ),然后这个文件就已经进入路由了,你可以通过 `http://localhost:3000/about` 访问了 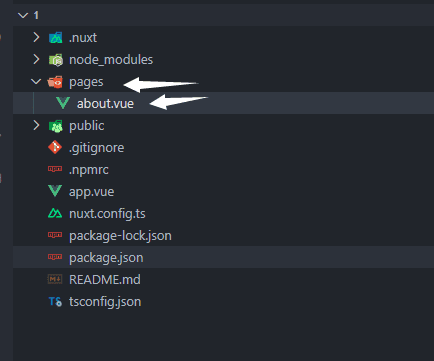 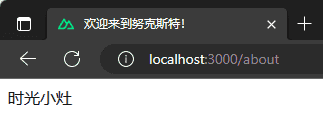 * 当然, `pages` 目录下的 `index.vue` 文件则是首页 # 嵌套路由 实际项目的需求咱们肯定不是只有 `localhost:3000/about` 这种一级路由,还会有 `localhost:3000/about/1` 、`localhost:3000/about/1/1` 这种嵌套路由 * 在Nxut3中,咱们要实现这种嵌套路由,是需要新建 `同级相同名称目录` 的,以下我会继续以 `/about` 来作为讲解 * 比如我们现在有一个 `/about` 页了,我们现在需要 `/about/1` 页面,那么我们就需要在同级文件夹新建一个 `about` 文件夹,再在这个文件夹里新建一个 `1.vue` 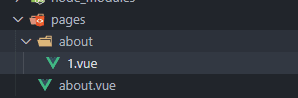 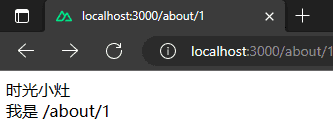 * 我们现在来通过 `useRouter().options.routes` 看一下routes的结构  * 这个结构是不是很熟悉?Nuxt3为我们自动生成了嵌套路由 * 更多级的路由你只需要套娃式地操作即可咯,注意,如果你不设置同级相同名称的目录和.vue文件,那么不会形成嵌套关系 # 布局 > layouts目录 这是Nuxt提供的一个可定制的公共布局框架 * 在项目根目录下创建一个 `layouts` 文件夹  * 然后我们在 `layouts` 文件夹下新建一个 `default.vue` ,它将作为 `<NuxtLayout />` 的默认布局   * 注意,这里的 `<slot />` 是作为插槽出口,你需要有一定的Vue插槽概念基础:[查看Vue官方插槽讲解](https://cn.vuejs.org/guide/components/slots.html) * 接着,在需要用到该布局的页面文件里添加 `<NuxtLayout><NuxtLayout />` 即可  * 这里的 `<slot />` 是作为插槽出口,你甚至可以定义 `name` 来区分插槽 * 你在 `<NuxtLayout><NuxtLayout />` 里添加的元素将添加到布局文件里的 `slot插槽出口` 上 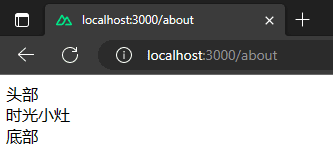 * 当然,你可以通过v-if条件编译区分公共布局是前台还是后台 * 如果我们需要为某个页面指定某个布局,我这里用 `admin` 来作为演示,在 `layouts` 文件夹下新建一个 `admin.vue`,然后在需要用到该布局的页面文件里添加 `<NuxtLayout name="admin" ><NuxtLayout />` 即可 # 中间件 > middleware目录 实际开发中,我们也许会在跳转某个路有前做点什么操作,或者说是决定是否跳转点击的路由 * 在项目根目录下创建 `middleware` 文件夹 * 这个文件夹里面的文件是以 `.js` 或者 `.ts`(推荐)为格式的 * 你也可以叫他 `导航守卫前` ## 全局中间件 * 我们首先就需要定义一个全局的中间件,它的命名应该是 `default.global.ts` ``` ``` export default defineNuxtRouteMiddleware((to: any, from: any) => { }); ``` * `to` 和 `from` 是什么就不用多说了吧,就是获取上一个路由和下一个路由的路由信息,这个在Vue原生模板中我们必用的一个东西,不过注意这个中间件属于 `导航前` * 然后你就可以根据业务需求编写代码了,它的一些语法请看官网学习,这里只是记录入门 ## 扩展 ### 在中间件里获取document、windows等 有的时候我们可能需要在这里获取Html元素,这时候我们不能直接获取到元素,比如document、windows等等因为是在服务端没有挂载前是不存在的 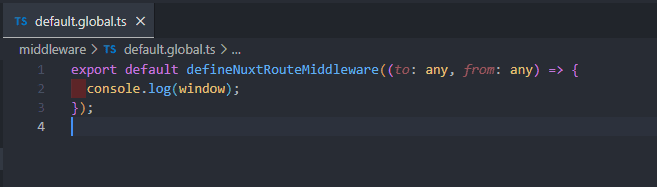 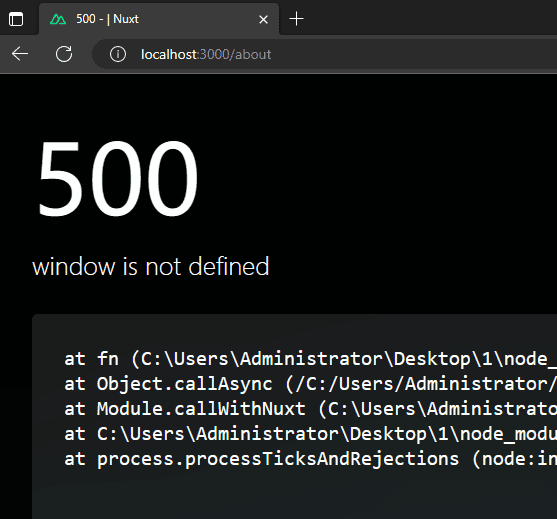 * 那么怎么解决呢 * 我们可以通过异步加载的方式获取 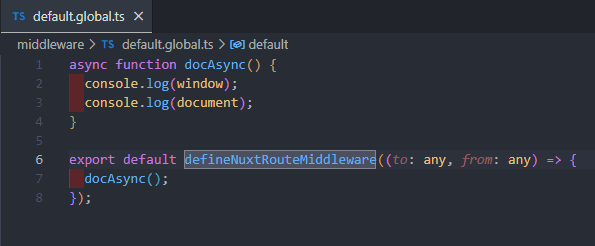 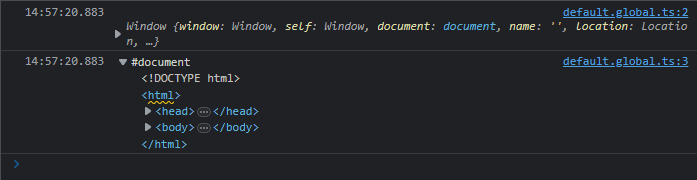 * 不过我是不推荐在中间件里操作document的,因为有的时候会出现莫名其妙的问题,比如我之前在这里面通过接口获取网站配置并保存到 Pinia 里,出现了服务器部署后访问项目强制刷新时无法获取到 Pinia 里的数据,所有还是推荐直接在 `app.vue` 里进行类似操作 # SEO优化和动态组合式Title 这个官网上有提,但是坑特别多,文档根本不完善,我这里记录一下我的方案 * 众所周知,网站是需要推广的,推广就需要较好的SEO,才能在搜索引擎上有较好的排名(当然你愿意花钱让别人帮你做词和提权重也不是不可以哈哈哈) * 除了开发时注意标签语义化和尽量保证清晰的HTML结构,我们还需要在动态seo上面做努力~ * 下面以页面 `tiitle` 作为例子哈! * 在 `nuxt.config.ts` 文件里,我们可以通过配置 `app.head.title` 来设置全局的页面title 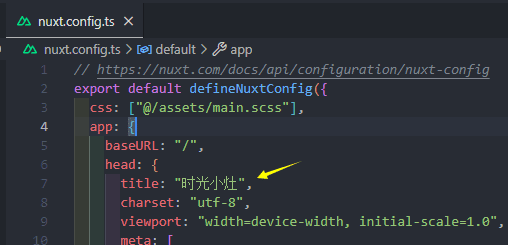 * 但是实际项目中我们肯定是需要每个页面都要有一个自己的title,而且可以组合base title的 * 我们需要这样做: ## 例子:近乎完美的SEO Title * 先在 `app.vue` 里添加 `useHead()` 配置 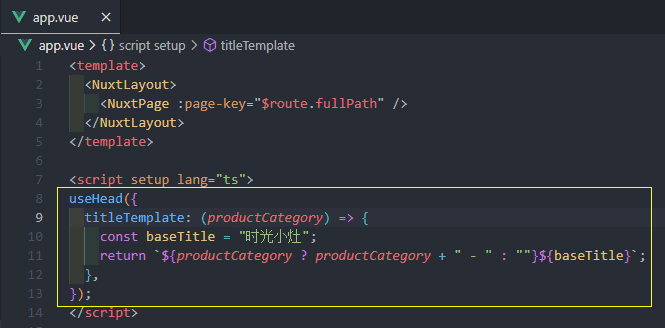 ``` useHead({ titleTemplate: (productCategory) => { const baseTitle = "时光小灶"; return `${productCategory ? productCategory + " - " : ""}${baseTitle}`; }, }); ``` * 然后,在我们的每个页面添加一个 `<Title></Title>` 组件,标签里面的字符将作为当前页面的动态title 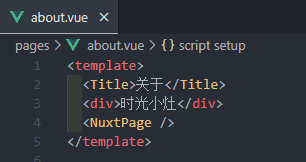 * 最终效果: 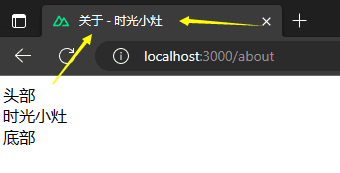 * 之后你部署到服务器和绑定域名后,通过第三方的seo查询均可以正常获取每个页面的title # Vue3 UI库 Element Plus ## 安装 ``` npm i @element-plus/nuxt -D ``` ``` // nuxt.config.ts export default defineNuxtConfig({ modules: ["@element-plus/nuxt"], elementPlus: { /** Options */ }, }); ``` * 安装好后就不需要手动import引入了 ## 使用Icon 图标 * 在 `elementPlus` 中添加 `icon: "ElIcon"` ``` export default defineNuxtConfig({ modules: ["@element-plus/nuxt"], elementPlus: { /** Options * icon: "ElIcon", }, }); ``` ### 手动导入 * 现在,你可以通过 `import { User, Lock } from "@element-plus/icons-vue";` 来使用所需要的图标 * 但是这种很麻烦,每一个图标都需要手动导入一下 ### 自动导入 * 在 `plugins` 文件夹里的 `global.ts` 文件里添加如下代码 ``` import * as ElementPlusIconsVue from "@element-plus/icons-vue"; export default defineNuxtPlugin(async (NuxtApp) => { // 其他code // 全局组件引入 for (const [key, component] of Object.entries(ElementPlusIconsVue)) { NuxtApp.vueApp.component(key, component); } // 其他code }); ``` # Pinia 及 持久化 ## 安装 ``` npm i pinia @pinia/nuxt ``` ## 使用 * 在 `项目名根目录` 创建 `stores` 文件夹 * 在 `stores` 文件夹里创建一个 `.ts` 文件,文件名自己取,之后使用的时候正确路径导入即可,下面以 `adminInfo.ts` 作为示例 ``` // adminInfo.ts import { defineStore } from "pinia"; export const adminConfig = defineStore("adminConfig", { state: () => { return { adminConfig: {}, }; }, actions: { adminConfigSet(data = {}) { this.adminConfig = data; }, }, }); ``` * 然后需要使用的页面导入即可 ``` import { adminConfig } from "~/stores/adminConfig"; const store = reactive<any>(adminConfig().adminConfig); ``` * 更多的关于Pinia知识点请到官网学习:[Pinia官网](https://pinia.vuejs.org/zh/core-concepts/) ## 持久化 pinia-plugin-persistedstate ### 安装 * 为了实现持久化,我们需要使用到一个依赖 `@pinia-plugin-persistedstate/nuxt` ``` npm i -D @pinia-plugin-persistedstate/nuxt ``` * 然后在 `nuxt.config.ts` 里添加配置 ``` export default defineNuxtConfig({ // other code modules: ["@pinia/nuxt", "@pinia-plugin-persistedstate/nuxt"], // other code }); ``` ### 用法 * 创建 Store 时,将 `persist` 选项设置为 `true` ``` // adminInfo.ts import { defineStore } from "pinia"; export const adminConfig = defineStore("adminConfig", { state: () => { return { adminConfig: {}, }; }, actions: { adminConfigSet(data = {}) { this.adminConfig = data; }, }, persist: true,// 设置为true }); ``` ## 注意 * 默认情况下,Store 将被保存在 cookie 中(在底层使用 Nuxt 的 useCookie) ### 选择 storage * 但可以通过使用自动导入的 `persistedState` 变量下的可用 storage 来配置你想要使用的 storage ``` import { defineStore } from "pinia"; export const adminConfig = defineStore("adminConfig", { state: () => { return { adminConfig: {}, }; }, actions: { adminConfigSet(data = {}) { this.adminConfig = data; }, }, persist: { // 下面的二选一 storage: persistedState.localStorage,// localStorage storage: persistedState.sessionStorage,// sessionStorage } }); ``` # 更多待补充... 最后修改:2023 年 03 月 29 日 © 允许规范转载 打赏 赞赏作者 支付宝微信 赞 0 分享不易,请老板打赏。
